

How To Display Data From Database In Html Table Using Javascript
In this tutorial, I will show you how to display data from the MySQL database table using Node.js. Even you will larn this tutorial with a simple example. In this example, All the data will display in the HTML table in the proper format. And then, read all the post-obit steps and employ them in your project.
Contents
- Display MySQL Data in HTML Table Using Node.js
- 1. Install Express Application
- 2. Connect Node.js App to MySQL Database
- 3. Create a Route to Fetch Information
- 4. Load Route into the root file
- 5. Create HTML Table to Brandish data
- vi. Run Node.js Code to brandish information in the HTML Table
- My Proffer
Display MySQL Information in HTML Table Using Node.js
Earlier getting started, You must insert data into the MySQL database using node.js. Fifty-fifty brand sure that Database Name is 'nodeapp' and tabular array proper noun is 'users'. If you lot desire to use your ain database & table proper noun and so you lot can.
ane. Install Express Awarding
You take to Install Bones Express Awarding similar the following project binder structure
myapp/ |__bin |__node_modules |__public |__routes/ | |__index.js | |__users.js |__views/ | |__index.ejs | |__users.ejs | |__user-list.ejs |__app.js |__database.js |__package-lock.json |__package.json
two. Connect Node.js App to MySQL Database
Showtime of all, you have to connect the node.js app to the MySQL database with the connection credentials like lost, username, password & database name
File Name – database.js
var mysql = require('mysql'); var conn = mysql.createConnection({ host: 'localhost', // Supercede with your host name user: 'root', // Supercede with your database username password: '', // Replace with your database password database: 'nodeapp' // // Supersede with your database Name }); conn.connect(office(err) { if (err) throw err; console.log('Database is connected successfully !'); }); module.exports = conn; iii. Create a Route to Fetch Data
You lot have to configure the following steps to create a route for fetching data using MySQL in Node.js –
- Include the database connection file
database.js - Create a route
/user-listto fetch data from theuserstabular array - Write a SQL query to fetch data from the database.
- Pass the fetched data into the view file in the course of
userData - At last. export router.
File Name – users.js
var limited = require('express'); var router = limited.Router(); var db=require('../database'); // another routes also appear here // this script to fetch data from MySQL databse tabular array router.get('/user-listing', function(req, res, next) { var sql='SELECT * FROM users'; db.query(sql, function (err, information, fields) { if (err) throw err; res.render('user-list', { championship: 'User List', userData: data}); }); }); module.exports = router; If you desire to create your ain road URL according to your projection requirement then you tin. But make sure that all the scripts must be right. otherwise, your app will not work properly.
4. Load Road into the root file
You have to include the created route in the app.js. If you forget to include this file, your app will not work. You will get an mistake when you effort to execute your script.
File Name – app.js
var createError = require('http-errors'); var limited = require('express'); var path = require('path'); var cookieParser = require('cookie-parser'); var logger = crave('morgan'); var indexRouter = require('./routes/index'); var usersRouter = require('./routes/users'); ; var app = express(); // view engine setup app.use('/', indexRouter); app.use('/users', usersRouter); app.fix('views', path.join(__dirname, 'views')); app.set up('view engine', 'ejs'); app.apply(logger('dev')); app.use(limited.json()); app.use(limited.urlencoded({ extended: simulated })); app.use(cookieParser()); app.utilize(limited.static(path.join(__dirname, 'public'))); // catch 404 and forward to error handler app.use(function(req, res, next) { next(createError(404)); }); // error handler app.utilize(part(err, req, res, next) { // set locals, only providing error in development res.locals.message = err.message; res.locals.error = req.app.get('env') === 'development' ? err : {}; // render the error page res.status(err.status || 500); res.return('error'); }); module.exports = app; 5. Create HTML Table to Display data
Configure the following steps to create an HTML table for displaying information –
- Create a file
user-listing.ejsin theviewsbinder. - Display data with the help of passing variable
userDatafrom the route.
File Proper noun – user-list.ejs
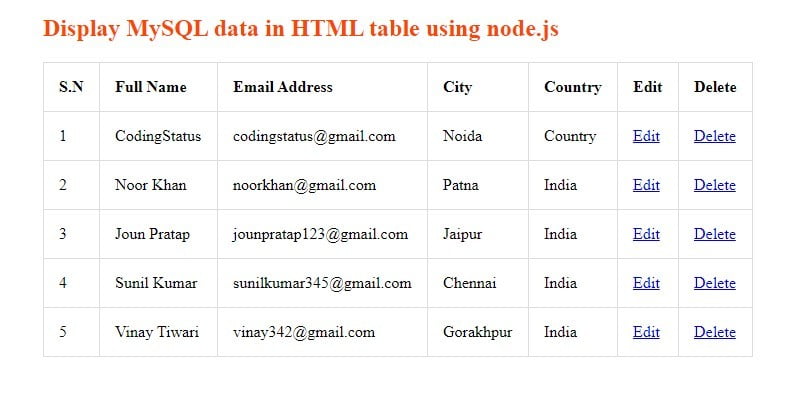
<!DOCTYPE html> <html lang="en"> <caput> <title>Fetch using MySQL and Node.js</title> </head> <body> <div class="tabular array-data"> <h2>Brandish Information using Node.js & MySQL</h2> <tabular array edge="1"> <tr> <thursday>Due south.N</th> <th>Full Proper name</thursday> <thursday>Email Address</thursday> <th>City</th> <th>Country</thursday> <th>Edit</th> <thursday>Delete</th> </tr> <% if(userData.length!=0){ var i=1; userData.forEach(function(information){ %> <tr> <td><%=i; %></td> <td><%=data.fullName %></td> <td><%=data.emailAddress %></td> <td><%=data.city %></td> <td><%=data.country %></td> <td><a href="/users/edit/<%=data.id%>">Edit</a></td> <td><a href="/users/delete/<%=data.id%>">Delete</a></td> </tr> <% i++; }) %> <% } else{ %> <tr> <td colspan="7">No Data Establish</td> </tr> <% } %> </tabular array> </div> </body> </html> half dozen. Run Node.js Code to display data in the HTML Tabular array
To Run Node.js lawmaking for displaying data in the HTML table, you will take to exercise the following things –
- Commencement your Node.js server using
npm offsetthe command - Enter the post-obit URL into your web browser
http://localhost:3000/users/user-listing
In this tutorial, I have taught you to display data in an HTML tabular array with elementary records of a tabular array. If are a beginner then you should execute this script as it is given. After that, try to implement it with another kind of largest data/records. If y'all are experienced and y'all need only its query then you can use it direct in your projection.
My Proffer
Dear developers, I hope you have understood the above script, At present you lot are able to display data from the MySQL database tabular array in Node.js. Even you tin brandish another table of data by using the higher up steps.
If you have any questions or suggestions regarding Node.js. Y'all tin can directly inquire me through the below comment box.

How To Display Data From Database In Html Table Using Javascript,
Source: https://codingstatus.com/how-to-display-data-from-mysql-database-table-in-node-js/
Posted by: johnsonimation.blogspot.com
0 Response to "How To Display Data From Database In Html Table Using Javascript"
Post a Comment